| |
If you have some moderate carpentry skills and even a small budget, you can transform your kitchen's look in a short time period, without the headaches that come with a complete kitchen overhaul.
You're probably wondering what all is involved in DIY kitchen cabinet refacing.
If you are confident that you can take accurate measurements, and you are reasonably skilled with a box cutter and a circular saw, then you'll be able to cut the veneer skin out and cut the end panels of your cabinets. You will also need to sand the exterior of your cabinets, when you tackle kitchen cabinet refacing.
 You will want to order the supplies before you are ready to begin your project, so that you will have everything you need to complete the job, without unscheduled delays. Your new do-it-yourself kitchen cabinet refacing depends on having all the correct items before you begin.
When you are beginning your do-it-yourself kitchen cabinet refacing, set aside all the tools, and make sure you have everything you need. Sand down the surfaces that you'll be using the veneer skin on, which includes the stiles around the cabinet box, in addition to the bottom and top rails. Rough the surface up without removing layers. You are sanding primarily to remove any grease and dirt that have accumulated on the surface of your cabinets.
After you have sanded, the next step in your kitchen cabinet refacing is to wipe the doors off with a tack cloth, which will help in getting rid of leftover dust. Lightly clean the areas with a damp cloth, and be sure that you don't saturate any wood areas. This will ensure that your veneer backing will securely adhere to the surface.
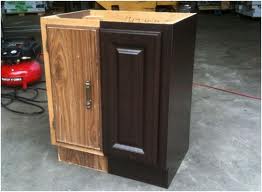
You can use door frames on your existing end panels if you want them to have a custom look, and this will also involve less cutting. If you don't have exceptional skills with a saw, you can simply substitute new cabinet doors for your end panel pieces.
After you have applied the end panels and glued or nailed them into place, you can begin putting the veneer skin on your cabinet frames. For DIY kitchen cabinet refacing, you can cut the pieces a bit larger than you need, to leave a margin for error. Start with the stiles, and only use enough backing to anchor it onto the face frames. Line it up well before you apply.
Peel your veneer as you press the skin down while smoothing it out. This step should be repeated when you apply the veneer skin to the rails.
|
|
When you begin to hang doors for your do-it-yourself kitchen cabinet refacing, place the hinges roughly two inches from the tops and bottoms of the doors and then secure them to the frame. Align them so that you can use new holes, so that the old holes won't strip out. When your job is complete, you'll have a new look for your kitchen, for a much lower cost than buying new cabinets.

